![]()
The Course Calendar is a great enhancement to the Education features, allowing teams to share webinars and events with their agents & clients.
Manufacturers are able to add these events through the portal by selecting Calendar from the sidebar navigation. In the Calendar page you can see any events that are currently live as well as sorting options and the option to add events.
To add an event, simply choose your event type from the drop down in the top right and click the New Event button. This will populate a window to add all of your event details such as timing, RSVP link, description, and image. Please make sure that any times entered are entered in Eastern Time, this will ensure they appear properly for agencies. Select submit to save your changes.
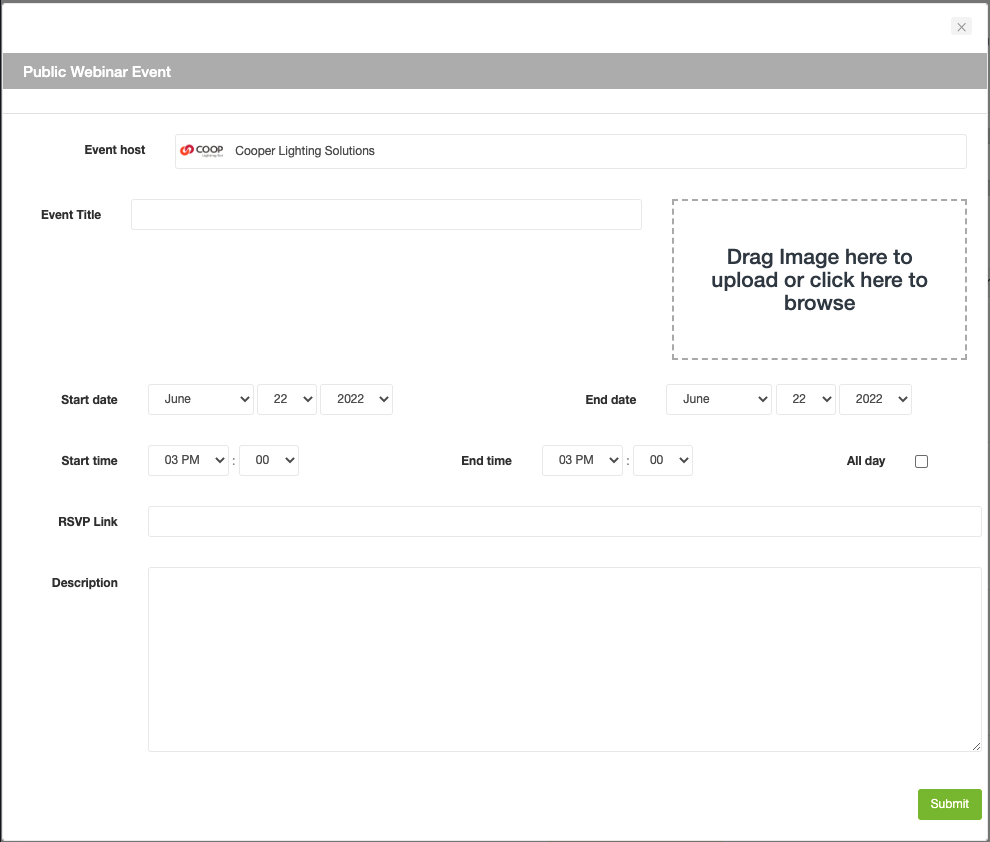
Event types are important in determining where the event appears for your Agents and the event type cannot be edited after the event is created. Events can be categorized in a few different ways but they are generally either Public or Private:
- Public Webinar Event- viewable on your Agents’ interactive line cards on their website; viewable to all
- Private Webinar Event- viewable on your Agents’ calendars within the portal only; viewable to only your agents
To edit an event, click on the event on the calendar to make the necessary changes or to delete the event all together.
Pro Tip: Our image sizing for event photos is 600px x 300px, or a 2:1 ratio.